
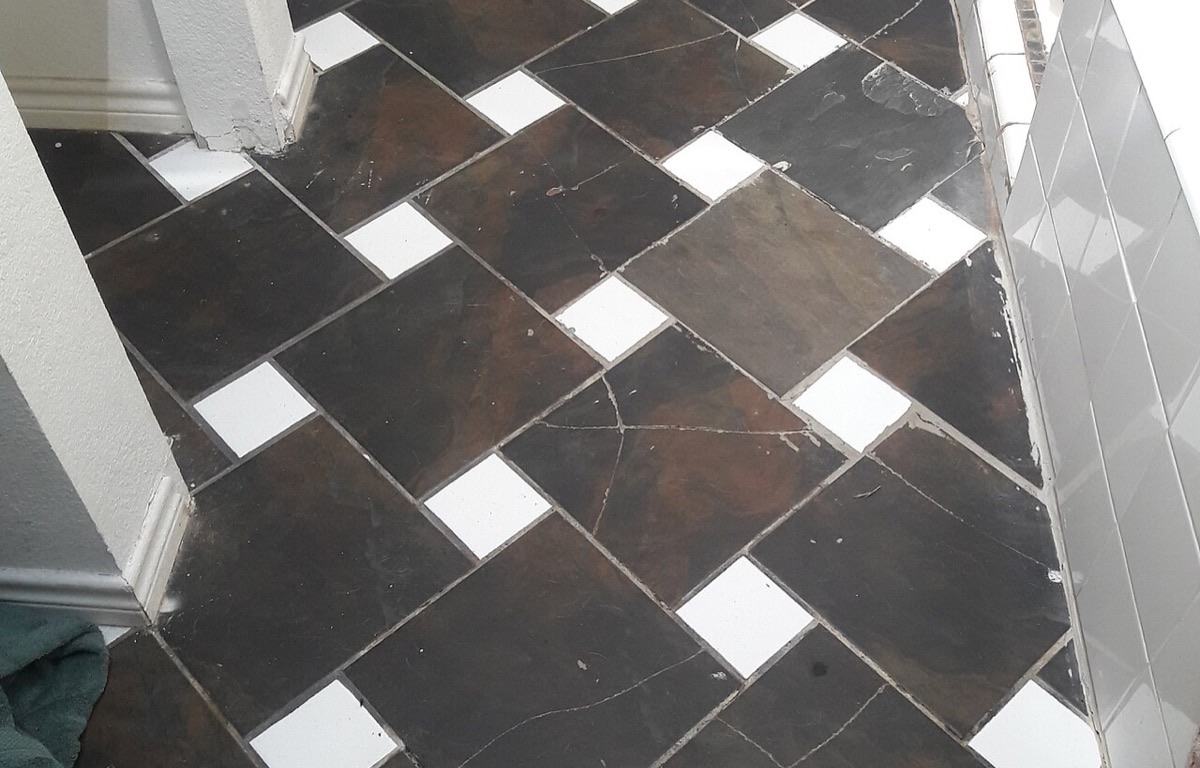

Check whether the tile moves, whether the crack reaches the edge or grout, and whether the area becomes damp after showering. Do not glue, grout or paint over a wet or loose tile without permission.
Bathroom tile damage is easy to underestimate because the visible chip may be only a few millimetres wide. The tile could have been struck by a bottle, stressed by movement, or damaged because water has reached the backing. A cosmetic nick on a dry, stable tile is different from a tile that sounds hollow, moves under light pressure or has a crack running into the joint.
Start with a photo and a dry surface. Do not pry up the tile, scrape out grout around a loose edge or apply a waterproof seal over an unknown condition. For related bathroom moisture symptoms, see the bathroom sealant guide.
If the tile is loose, sharp, damp behind the edge, or near a shower control, electrical fitting or bath panel, stop and report it. A cosmetic repair can trap moisture and make the original condition harder to inspect.
Inspect the chip without disturbing the tile
Dry the face of the tile and take a wide photo showing the room, then a close photo of the chip. Look for a hairline crack, a missing glaze, exposed porous material, damaged grout or a dark edge. Check whether the damage is at a splash zone, beside a tap or near the floor.
Press lightly with one fingertip. Do not lever the tile or tap it with a tool.
A split grout line, open sealant or lifted edge can matter more than the small chip itself.
Photograph the area dry, then note whether the edge or backing remains damp after a shower.
Keep the area dry while you decide
Wipe splash from the surface, keep bottles from pressing against the damaged area and use the bathroom's normal ventilation. Do not direct a hair dryer at the tile, soak it to test waterproofing or scrub the chip with an abrasive pad.
EPA guidance on mold and moisture emphasizes fixing the source of water and drying affected materials rather than sealing over recurring dampness (US EPA: Mold, moisture and your home). That principle applies here: the tile finish is not the whole waterproofing system.
When a cosmetic touch-up may be appropriate
A tiny surface nick on a stable, dry tile may be a cosmetic matter, but ask permission before using a repair pen, epoxy or matching grout. Products differ by tile type, sheen and wet-area location. A patch can look darker, peel during cleaning or interfere with a later replacement.
Do not use ordinary wall filler, nail polish, silicone or household glue as a substitute for a tile repair. Do not paint the whole tile to hide a chip. If the landlord approves a product, test it on a spare tile or an unseen area and keep the product details with your repair record.
Know when the tile needs maintenance
Report the tile if it moves, has a crack through the body, has sharp edges, is missing a section, becomes damp, has mold around the joint, or is in a place where water can reach the backing. Also report a recurring crack or a cluster of damaged tiles, which may indicate movement behind the finish.
Describe what changes after ordinary use. “One tile chipped” is useful; “the chip is beside the shower control, the tile moves slightly and the grout stays dark after the room dries” is much better.
Keep a clear move-out record
If the chip was present at move-in, compare your inventory and send the original photo before cleaning around it. If it happened during the tenancy, report it honestly and ask whether maintenance wants to inspect before handover. Leave the area accessible rather than placing a bottle, mat or storage box in front of it.
For a wider bathroom pass, use the bathroom handover guide. It covers how to document sealant, drainage, ventilation and moisture without disguising a repair issue.
Keep water and sharp edges contained
A chipped tile needs a stability and moisture check before it needs a matching color. Photograph it, keep it dry, avoid improvised filler and report anything loose, sharp or damp. Continue with the full guide library for the next bathroom check.
These links support specific safety, maintenance or jurisdiction examples in the article. General guidance cannot replace the instructions for the exact appliance, fitting, lease or location.